Quick Overview
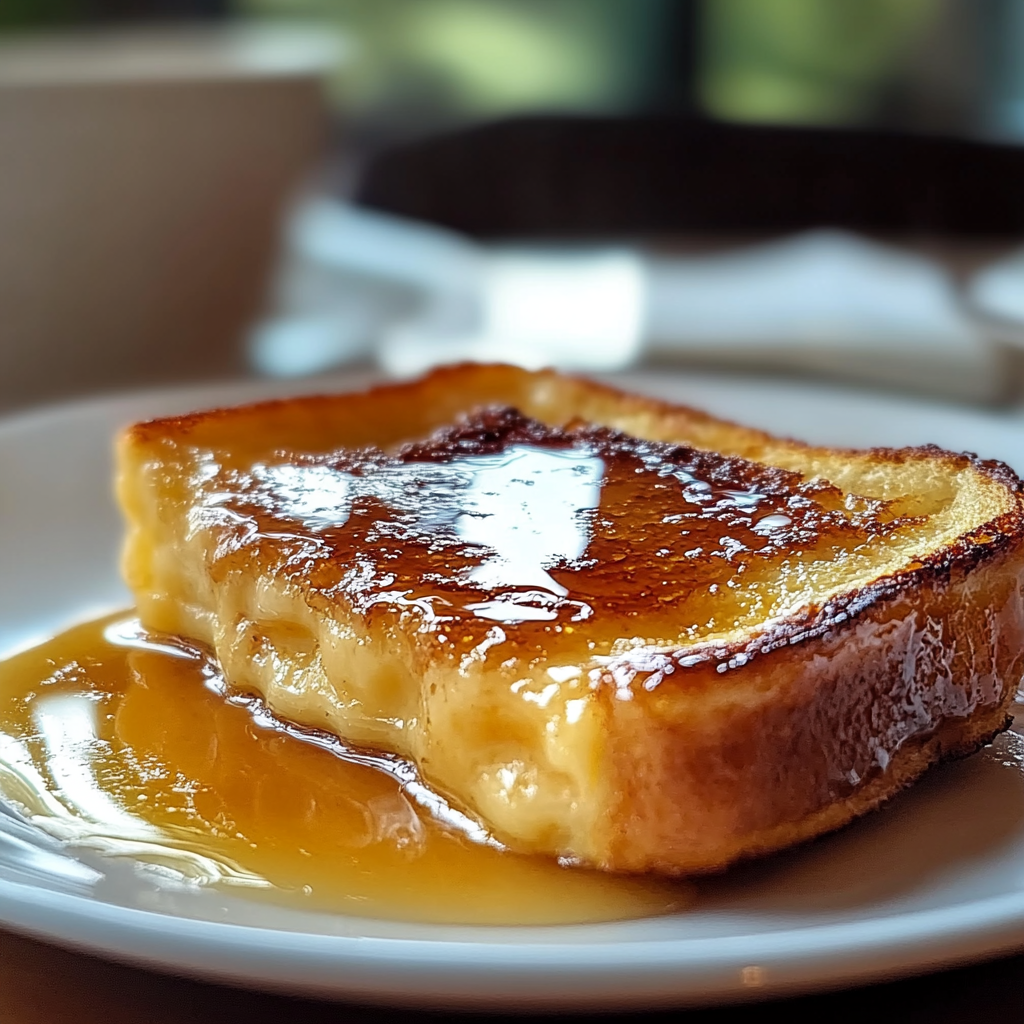
Are you ready to indulge in a breakfast that feels like dessert? Our Overnight Crème Brûlée French Toast Recipe is the perfect way to start your day on a sweet note. With its rich custard base and a crispy caramelized topping, this dish brings the classic crème brûlée experience right to your breakfast table. Imagine waking up to the aroma of freshly baked toast infused with vanilla and caramel notes, all without the morning rush of preparation.
This recipe is designed for those who love the idea of preparing a delicious meal ahead of time. By letting the bread soak overnight in a creamy mixture, you allow the flavors to meld beautifully. The result? A decadent treat that satisfies both your cravings for breakfast and dessert simultaneously. Perfect for holiday gatherings or weekend brunches, this dish is bound to impress your family and friends.
Whether you’re an experienced cook or just starting in the kitchen, this Overnight Crème Brûlée French Toast Recipe offers simple yet detailed steps for everyone to follow. Get ready to savor each bite; this dish is not just about filling your stomach but also about indulging your taste buds. Let’s dive into the ingredients you’ll need to create this mouthwatering masterpiece!
Ingredient Breakdown
Bread (1 loaf)
Choosing the right type of bread is essential for achieving that perfect texture in your Overnight Crème Brûlée French Toast. Brioche or challah bread works best because they are soft and fluffy yet sturdy enough to soak up the custard mixture without falling apart. You will need one loaf cut into thick slices—about 1-inch thick—to create layers of goodness. If you prefer a slight crunch on the outside with a soft interior, allow the bread slices to sit out for a few hours before using them.
Eggs (4 large)
Eggs are crucial for providing structure and richness in any custard-based dish. In this recipe, you’ll need four large eggs which will help bind all ingredients together while giving it that creamy texture reminiscent of traditional crème brûlée. Fresh eggs are always recommended for optimal flavor; make sure they are at room temperature before mixing them with other ingredients.
Milk (2 cups)
Milk adds creaminess and moisture to our custard base. Using whole milk enhances the richness of the final dish but feel free to substitute with 2% or even almond milk if you’re looking for a lighter option or dairy-free alternative. Ensure that you whisk it thoroughly with the eggs and sugar so that everything blends smoothly.
Heavy Cream (1 cup)
Heavy cream takes this recipe over-the-top by adding an extra layer of decadence that makes each bite melt in your mouth. The combination of milk and heavy cream creates a luxurious custard flavor profile essential for an authentic crème brûlée experience. Be careful not to skimp on quality here; choose fresh heavy cream for best results.
Sugar (3/4 cup)
Sugar is vital not only for sweetness but also for creating that iconic caramelized topping found in crème brûlée desserts. This recipe calls for three-quarters cup of granulated sugar—half will be mixed into the custard while half will be used later as a topping before serving. You can also experiment with brown sugar if you want deeper molasses notes.
Vanilla Extract (2 teaspoons)
Vanilla extract elevates this dish by introducing warm aromatic flavors that complement both the creamy custard and crunchy top layer perfectly. Use pure vanilla extract rather than imitation vanilla for authentic taste; it makes quite a difference! Measuring out two teaspoons should provide just enough fragrance without overpowering other ingredients.
Step By Step Recipe: Overnight Crème Brûlée French Toast Recipe
Preparing The Custard Base
To begin crafting your Overnight Crème Brûlée French Toast Recipe, gather all necessary ingredients on your countertop so everything is within reach. Start by taking a large mixing bowl and cracking open four large eggs—whisk them vigorously until they become frothy and well combined. This step ensures even distribution of yolks and whites throughout your mixture.
Next, add two cups of whole milk followed by one cup of heavy cream into the bowl containing eggs while continuing to whisk gently until everything forms a smooth consistency devoid of lumps or bubbles. Then incorporate three-quarters cup granulated sugar along with two teaspoons pure vanilla extract into this mixture; these additions provide sweetness along with signature flavor notes inherent in crème brûlée recipes.
Once everything has been blended uniformly together, set aside your custard mixture temporarily while preparing the bread slices needed for soaking later on.
Assembling The Bread Layers
Now comes the fun part—layering! Grab that loaf of brioche or challah bread you’ve set aside earlier; slice it into generous pieces about one inch thick if you haven’t done so already. Arrange half these slices neatly at the bottom of an appropriately sized baking dish (preferably around 9×13 inches). Make sure they fit snugly together without leaving too much empty space between each slice.
Pour half your prepared custard evenly over these bread layers ensuring every piece gets soaked adequately from top downwards; use a spatula if necessary to redistribute excess liquid around edges where needed after pouring! Place remaining slices atop soaked pieces before drenching them again with remaining custard mixture using similar techniques as before—this double layer allows maximum absorption overnight!
Cover tightly using plastic wrap or aluminum foil then refrigerate overnight (or at least eight hours) so flavors meld beautifully while bread absorbs all those delicious creamy notes from custard base prepared earlier.
Baking The French Toast
The next day arrives filled with anticipation as you prepare yourself for baking magical creations hidden away in fridge overnight! Preheat oven first at temperature setting around 350°F (175°C); this ensures perfect cooking environment conducive towards achieving golden-brown exterior along with tender interior upon completion.
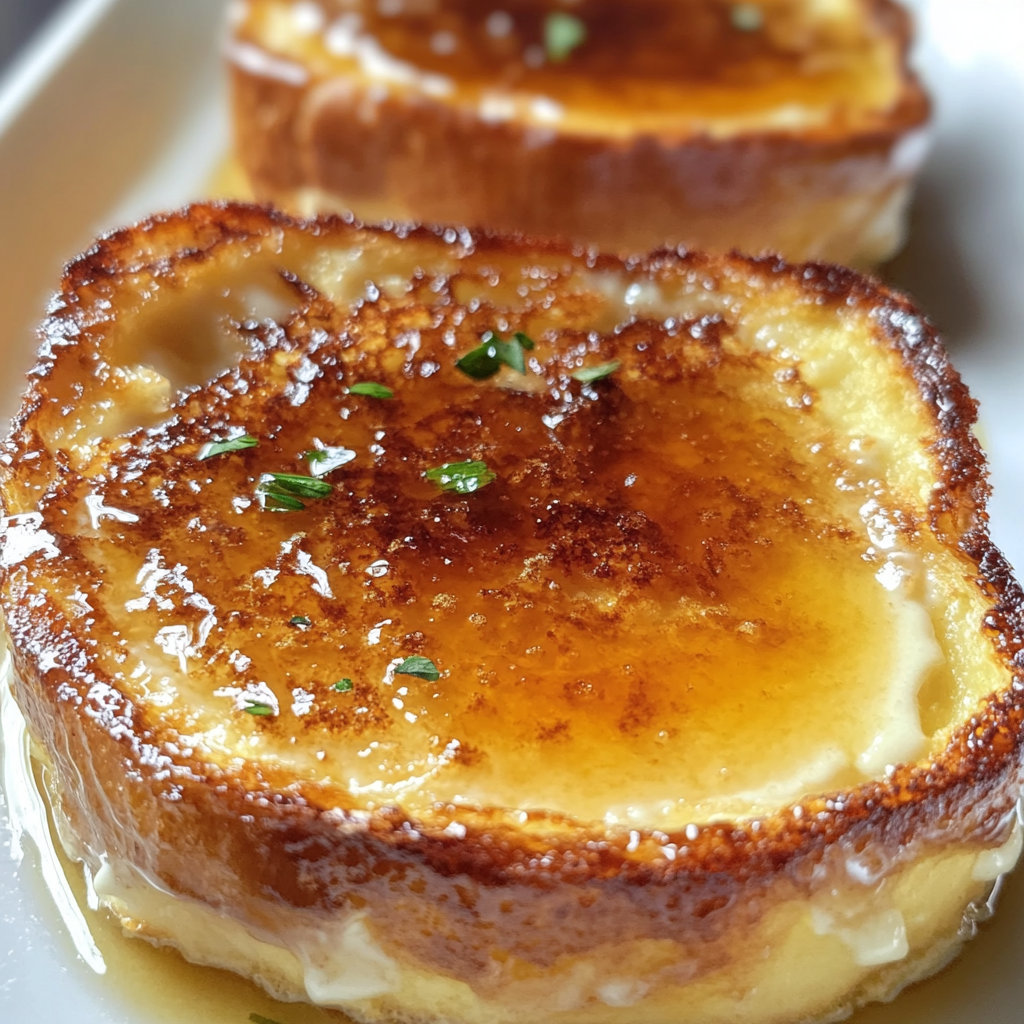
Uncover baking dish exposing beautiful layered masterpiece formed during resting period—it should appear slightly puffed but still moist overall! Sprinkle remaining three-quarters cup sugar liberally across surface area covering entire top layer evenly before placing inside preheated oven allowing sugars caramelize further enhancing rich flavor profiles desired from traditional crème brûlées served warm after cooking finishes successfully!
Bake uncovered approximately 40–45 minutes depending on individual oven characteristics until edges turn bubbly golden brown while center remains slightly soft yet firm when touched lightly—a toothpick inserted should come out clean indicating doneness achieved successfully without drying out whole concoction completely!
Once finished remove carefully from oven allowing cooling time briefly before slicing pieces generously serving hot topped optionally whipped cream alongside fresh berries garnishing plate aesthetically pleasing too!
Serving and Storing Tips
Serving Suggestions
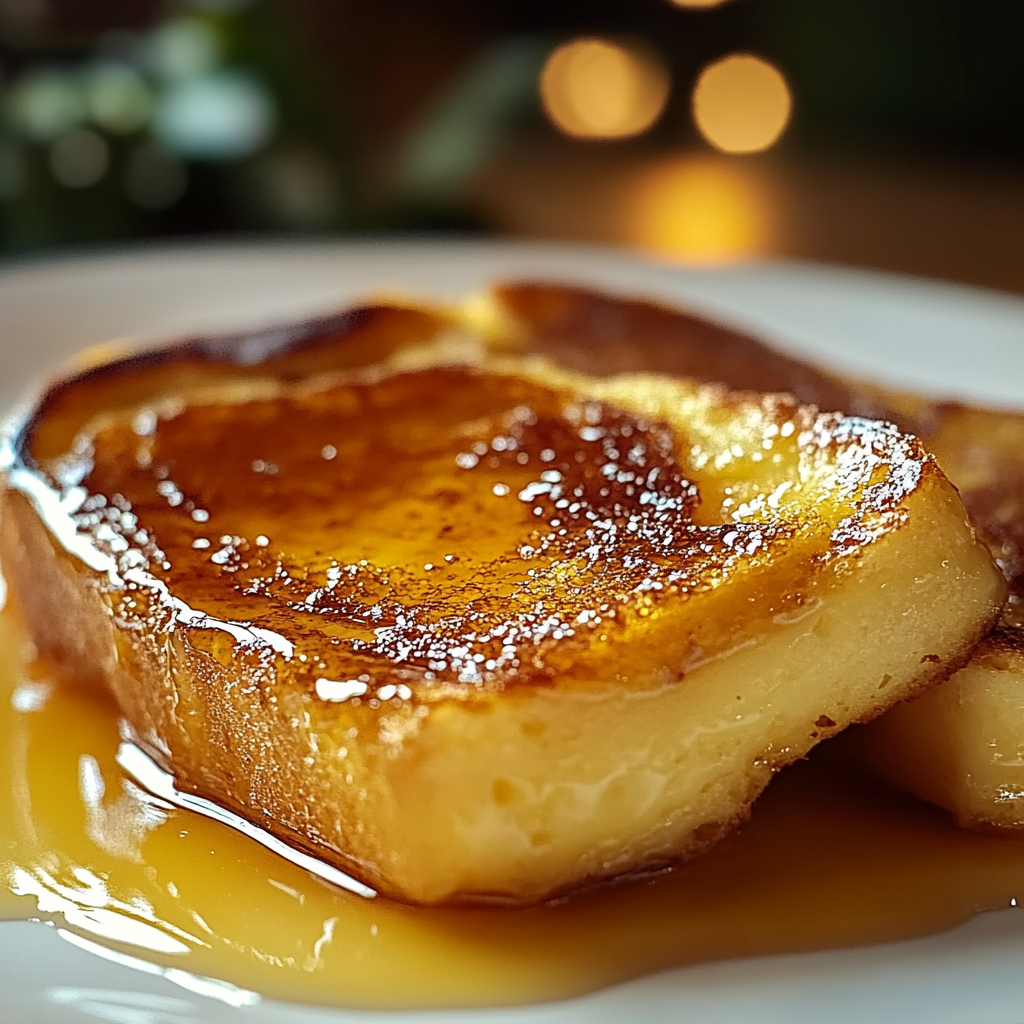
After allowing some time cooling down post-baking process complete it’s finally time dig into decadent layers created through efforts expended thus far! For serving purposes consider placing generous portion onto individual plates garnished alongside dollops whipped cream possibly drizzled maple syrup enhancing sweetness even further alongside fresh seasonal fruits adding vibrant colors contrast visually appealing diners awaiting first bites eagerly!
You might also wish sprinkling powdered sugar above each serving adding elegant touch reminiscent fine dining experiences often associated upscale restaurants specializing desserts such as crème brûlées themselves! Encourage guests share their thoughts about delightful flavors experienced during meal together fostering conversations lingering long after plates cleared away ensuring everyone leaves happy bellies behind!
Storage Guidelines
Should any portions remain uneaten after initial servings don’t fret! Proper storing techniques can prolong freshness allowing enjoyment later down road too! Allow leftover pieces cool completely prior transferring airtight container storing refrigerator prevents drying resulting unsatisfactory textures when reheating later date—ideally consume leftovers within two days maximize optimal flavors retained throughout preservation efforts made diligently beforehand!
When reheating simply place desired amount onto microwave-safe plate warming gentle intervals checking frequently until warmed through thoroughly without overheating risking dryness ruining textures enjoyed originally fresh out oven first served hot initially—you could also opt reheating oven method wrapping foil preventing excess browning occurring during process keeping moisture intact nicely preserving original intent behind creation fully intact perfectly suited breakfasts enjoyed anytime day wish enjoy something sweet unexpectedly available waiting patiently within fridge inviting another round indulgence soon enough ahead!
Mistakes to avoid
When making the Overnight Crème Brûlée French Toast Recipe, several common mistakes can affect the final result. It’s essential to be aware of these pitfalls to create a delicious dish.
One major mistake is not allowing enough time for the bread to soak in the custard mixture. The key to achieving that rich, creamy texture lies in letting the bread absorb the flavors thoroughly. Skipping this step might leave you with dry toast rather than a luscious breakfast treat. Be sure to let it soak overnight or at least for several hours before cooking.
Another frequent error is using stale or low-quality bread. Fresh, thick slices of brioche or challah work best for this recipe. Stale bread may not absorb the custard properly, resulting in uneven cooking and a disappointing texture. Aim for high-quality ingredients; they make a noticeable difference in flavor and texture.
Not preheating your oven adequately can also lead to issues. If your oven isn’t hot enough when you place your dish inside, it will take longer to cook, which can result in soggy areas or burned edges. Always ensure that your oven reaches the desired temperature before putting in your French toast.
Lastly, many people forget about proper caramelization when finishing off their crème brûlée topping. A kitchen torch is ideal for achieving that perfect golden crust, but if you don’t have one, broiling can work as well. Just keep an eye on it while broiling, as it can burn quickly.
Avoiding these mistakes will help you whip up a fantastic Overnight Crème Brûlée French Toast that everyone will love.
Tips and tricks
Creating a scrumptious Overnight Crème Brûlée French Toast Recipe requires some helpful tips and tricks that can elevate your dish while ensuring ease of preparation.
First, consider adding flavor variations to your custard mixture. While vanilla extract is traditional, you can also incorporate orange zest or almond extract for a unique twist. These additions can enhance the overall taste without overwhelming the classic crème brûlée profile.
Another tip is to use a heavy baking dish for even cooking. A ceramic or glass baking dish retains heat better than metal pans, promoting uniform cooking throughout. This ensures that every piece of toast develops that desirable golden-brown crust while maintaining a soft interior.
It’s also wise to prepare your toppings ahead of time. While sugar is commonly used for caramelization, you might want to experiment with flavored sugars such as cinnamon-sugar or maple sugar for an exciting touch. Prepare these toppings before assembling your dish so you have everything ready when it’s time to serve.
Don’t forget about presentation! When serving your Overnight Crème Brûlée French Toast, consider garnishing with fresh berries or whipped cream for added color and flavor contrast. This not only makes the dish visually appealing but also adds freshness that complements the rich custard base beautifully.
By following these tips and tricks, you’ll be well on your way to creating an unforgettable breakfast experience with your Overnight Crème Brûlée French Toast Recipe.
Suggestions for Overnight Crème Brûlée French Toast Recipe
To achieve perfection with your Overnight Crème Brûlée French Toast Recipe, here are some thoughtful suggestions that can make all the difference in taste and presentation.
One suggestion is to let the assembled dish rest in the refrigerator overnight before baking it. This step allows all flavors to meld beautifully and gives the bread time to absorb all that creamy custard goodness fully. If you’re short on time, aim for at least four hours of soaking; however, overnight is ideal.
Consider adding layers of flavor by incorporating chocolate chips or caramelized fruits between layers of bread before pouring over the custard mixture. Adding chocolate can introduce richness while fruits like bananas or peaches provide natural sweetness and moisture.
For an extra touch of indulgence, try drizzling warm maple syrup over each serving just before serving them up! The combination of sweet syrup with creamy custard creates an irresistible flavor profile that will please everyone at breakfast time.
If you’re looking for more texture, consider topping each portion with chopped nuts after caramelizing the sugar crust. Nuts like pecans or almonds offer crunchiness against the smoothness of both the creme brulee topping and soft toast beneath.
These suggestions not only elevate the traditional recipe but also allow you room for creativity while still delivering amazing results!

FAQs
What type of bread works best for Overnight Crème Brûlée French Toast?
Choosing quality bread significantly impacts your Overnight Crème Brûlée French Toast Recipe outcome. For optimal results, brioche or challah are excellent choices due to their rich texture and ability to absorb custard effectively without falling apart during cooking. These breads are soft yet sturdy enough to hold up under pressure from soaking overnight in egg-based mixtures full of creaminess and flavor.
Additionally, avoid using regular sandwich bread since it lacks density and might turn mushy instead of yielding fluffy bites with rich flavors after baking! Opting for freshly baked loaves instead ensures maximum deliciousness!
Can I prepare this recipe gluten-free?
Yes! You can easily modify the Overnight Crème Brûlée French Toast Recipe into a gluten-free version by using gluten-free bread alternatives available in stores today! Many brands offer delicious options made from rice flour or almond flour which mimic traditional textures well when soaked overnight in custards!
Just remember: always check labels carefully when selecting ingredients such as milk-based products like cream because some may contain additives unsuitable for strict gluten-free diets!
How do I store leftovers?
To maintain freshness after preparing this delightful breakfast treat, store any leftovers properly! Allow cooled portions to sit out briefly before transferring them into airtight containers; they can typically last about three days stored correctly within refrigerators!
When reheating leftover servings later on—use either microwave settings (on low power) OR bake covered loosely at lower temperatures until warmed through again—this helps retain moisture levels within pieces without drying them out too much!
Can I freeze my prepared dish?
Freezing is possible if you’ve made too much Overnight Crème Brûlée French Toast—but keep some guidelines in mind first! After allowing them cool completely down post-baking process then slice into individual servings promptly wrap tightly utilizing plastic wrap followed by foil before placing them slowly inside freezer bags!
To reheat frozen portions successfully—let thaw overnight within fridges beforehand heating them up until warmed through baked again (as mentioned above). Follow these steps carefully so none are wasted nor lose flavor during storage periods!
What toppings pair well with this recipe?
Toppings play an essential role when elevating flavors found within each bite! Alongside classic options like maple syrup—try fresh fruit additions such as strawberries blueberries raspberries providing not only beautiful colors but juicy bites too enhancing overall enjoyment levels greatly!
Other favorites include whipped cream dollops sprinkled cinnamon powder nutmeg—these little touches create delectable contrasts against creamy textures present throughout dishes offering delightful surprises along every forkful enjoyed together!
How long does prep take before baking?
Preparation usually takes around 15-20 minutes depending on how intricate assembly stages might get; however actual baking itself typically requires between 30-45 minutes based upon personal oven calibration alongside sizes chosen regarding dishes utilized during preparations beforehand too!